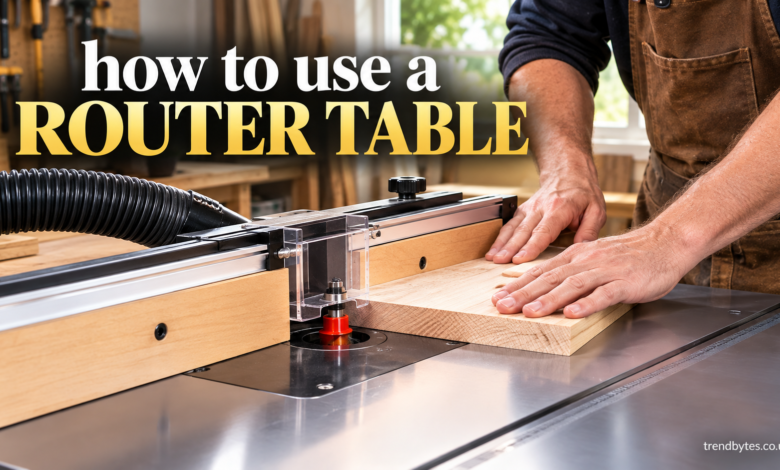
Learning how to use a router table can make woodworking faster, safer, and more accurate. A router table turns a handheld router into a stationary cutting tool, allowing you to guide wood across a router bit with better control.
Whether you want to make decorative edges, cut grooves, create rabbets, or build clean joinery, a router table is a useful addition to a woodworking shop. However, proper setup and feed direction are essential because router bits spin at high speed.
This guide explains how to use a router table step by step, including router setup, bit selection, cutting techniques, safety practices, and common mistakes beginners should avoid.
What Is a Router Table?
A router table is a flat work surface designed to hold a router underneath the table. The router bit extends through an opening in the tabletop, allowing you to move the workpiece across the spinning bit.
Unlike using a router by hand, a router table keeps the tool stationary while you control the wood.
This setup is especially useful when working with narrow, long, or repeated pieces. It can also provide greater consistency when making several identical cuts.
Common router table applications include:
- Creating decorative edge profiles
- Cutting grooves and dados
- Making rabbets
- Trimming wood edges
- Creating raised-panel profiles
- Cutting joinery
- Producing repeated shapes
- Working with small or narrow stock
How to Use a Router Table Safely
Before learning how to use a router table, understand the most important safety rules.
A router bit can rotate thousands of times per minute, so even a small mistake can cause serious injury or damage your project.
Always wear safety glasses and hearing protection. Avoid loose clothing, jewelry, and anything that could become caught in the machine.
Make sure the router is securely mounted beneath the table. Check that the router bit is properly installed and tightened according to the manufacturer’s instructions.
Most importantly, disconnect the router from power whenever changing bits or making adjustments.
Use the router table’s fence, featherboards, push blocks, and guards when appropriate. Keep your hands away from the spinning bit and never try to remove a piece of wood while the router is running.
How to Use a Router Table: Step-by-Step
The best way to learn how to use a router table is to follow a consistent setup process.
1. Choose the Right Router Bit
Start by selecting a bit designed for the cut you want to make.
For example, a round-over bit creates a rounded edge, while a straight bit can cut grooves or rabbets. A flush-trim bit can help trim one surface to match another.
Use a sharp, undamaged bit that matches your router’s collet size.
If you are unsure which bit to use, check the bit manufacturer’s instructions and consider practicing on scrap wood first.
2. Install the Router Bit
Unplug the router before installing the bit.
Insert the bit into the collet according to the manufacturer’s instructions. Do not insert the bit too far into the collet, and do not leave an excessive amount of the shank exposed.
Tighten the collet securely using the proper wrench.
After installation, rotate the bit by hand while the router is still disconnected from power. Make sure it appears properly seated and does not wobble.
3. Set the Correct Cutting Depth
Adjust the bit height so that only the necessary portion of the cutting edge contacts the workpiece.
For many operations, it is better to remove material in multiple shallow passes rather than attempting one deep cut.
This reduces strain on the router and gives you better control over the workpiece.
A practical example is cutting a deep groove. Instead of cutting the entire groove depth in one pass, make several smaller adjustments until you reach the desired depth.
4. Adjust the Router Table Fence
Position the fence according to the cut you are making.
The fence should be secure, straight, and parallel to the intended path of the workpiece.
For edge profiling, the fence helps keep the board moving consistently. For other operations, you may need to adjust the fence position so the router bit removes the correct amount of material.
Always test the setup on scrap wood before cutting your actual project.
5. Set the Router Speed
Different router bits and materials may require different speeds.
A larger-diameter bit generally requires a lower speed than a small bit because the cutting edge travels faster around the circumference.
Follow the bit manufacturer’s recommended speed range whenever available.
If the router sounds strained, the wood burns, or the cut becomes difficult to control, stop and reassess the setup.
6. Position the Workpiece Correctly
Place the workpiece firmly against the table and fence.
Identify the correct feed direction before switching on the router.
For a standard router table operation, the workpiece is generally fed from right to left against the rotation of the bit. This is known as conventional feed and helps the bit pull the workpiece against the fence rather than pushing it away.
Never casually feed the wood in the opposite direction. Climb cutting can cause the router to grab the material and pull it rapidly through the cut.
7. Make the Cut
Once everything is checked, turn on the router and allow it to reach full operating speed.
Hold the workpiece firmly against the table and fence. Feed it smoothly and steadily.
Do not force the material through the bit. Let the router remove material at a controlled rate.
If you hear excessive vibration, see burning, or feel the router struggling, stop the operation and investigate the cause.
For long boards, use appropriate infeed and outfeed support so the workpiece stays stable throughout the cut.
Understanding Feed Direction
Feed direction is one of the most important concepts when learning how to use a router table.
The router bit spins in a specific direction. Your job is to move the workpiece against that rotation during normal routing.
On a typical router table, this means feeding the wood from right to left.
Correct feed direction helps the bit press the workpiece toward the fence. Incorrect feeding can cause a dangerous climb cut, where the bit grabs the wood and attempts to move it rapidly in the direction of rotation.
For beginners, avoid climb cuts unless you fully understand the technique and have a specific reason to use one.
Choosing the Right Router Bit
The router bit determines the shape and purpose of your cut.
Here are several common options:
Straight bits: Useful for grooves, dados, and rabbets.
Round-over bits: Create smooth, rounded edges.
Chamfer bits: Produce angled edges.
Rabbeting bits: Cut stepped recesses along an edge.
Flush-trim bits: Trim one material flush with another using a bearing as a guide.
Cove bits: Create concave decorative profiles.
Pattern bits: Useful for copying an existing shape or template.
Start with a few common bits rather than buying a large collection immediately. As your woodworking projects become more advanced, you can add specialized profiles.
Expert Tips for Better Router Table Results
A few simple habits can dramatically improve your results.
First, always test your setup on scrap material. This lets you confirm bit height, fence position, speed, and feed technique before working on an expensive board.
Second, make multiple shallow passes for deeper cuts. This is often cleaner and easier to control than removing a large amount of material at once.
Third, keep router bits sharp and clean. Dull bits can increase friction, produce poor finishes, and make the router work harder.
Finally, support long workpieces. A board that tips or drops as it passes the router bit can ruin an otherwise accurate cut.
Common Router Table Mistakes to Avoid
Feeding the Wood the Wrong Way
This is one of the most serious beginner mistakes. Always understand the router bit’s rotation and normal feed direction before making a cut.
Taking Too Deep a Cut
Trying to remove too much material in one pass can cause burning, tear-out, vibration, and loss of control.
Ignoring Grain Direction
Wood grain affects the quality of the finished edge. Routing against unfavorable grain can cause tear-out, especially near corners and transitions.
Using a Dull Bit
A dull bit requires more force and can leave a rough surface. Replace or properly sharpen bits when necessary.
Failing to Secure the Fence
A fence that moves during a cut can ruin the workpiece and create a safety hazard.
Skipping a Test Cut
Even experienced woodworkers can make mistakes when changing setups. A small piece of scrap wood is cheap insurance.
Router Table Best Practices
For consistent woodworking results, develop a repeatable routine.
Check the router and bit before every project. Confirm that the bit is tight, the fence is secure, and the cutting depth is correct.
Use push blocks or other appropriate work-holding accessories when your hands would otherwise come too close to the bit.
Keep the tabletop clean so the workpiece can slide smoothly. Dust and debris underneath a board can affect cutting depth and accuracy.
When making several identical pieces, establish the fence and router height carefully and avoid changing the setup unnecessarily.
Most importantly, never rush. A controlled feed rate usually produces a better result than trying to finish the cut quickly.
What Can You Make With a Router Table?
Once you understand the basics, a router table can be used for many woodworking projects.
You can create decorative cabinet edges, picture frames, furniture components, shelves, boxes, doors, trim, and various types of joinery.
For example, a woodworker building a cabinet door might use a router table to create a decorative profile around the door frame. Someone making a simple wooden box could use a straight bit to create grooves for the bottom panel.
The stationary design also makes repeated edge profiles easier because the fence and bit height can remain consistent.
People Also Ask
Can a beginner use a router table?
Yes. A beginner can use a router table successfully by starting with simple cuts, using scrap wood for practice, following the correct feed direction, and applying proper safety procedures.
What direction do you feed wood on a router table?
For a standard router table setup, the workpiece is generally fed from right to left, against the rotation of the router bit. This helps keep the workpiece against the fence.
Is a router table better than a handheld router?
Neither is universally better. A handheld router is versatile and useful for many tasks, while a router table offers greater stability and control for edge profiles, repeated cuts, and certain joinery operations.
What is the safest router table feed direction?
The safest standard feed direction is against the bit’s rotation, which normally means right to left on a conventional router table. Avoid climb cutting unless you specifically understand the technique and its risks.
How deep should a router cut be in one pass?
It depends on the router, bit, material, and operation. For deeper cuts, multiple shallow passes are generally easier to control and can reduce strain, burning, and tear-out.
Do you need a fence on a router table?
A fence is extremely useful for many router table operations because it guides the workpiece and helps maintain consistent cuts. Some specialized operations may use other guides or templates instead.
Why does my router table cut burn the wood?
Burning can result from feeding too slowly, using a dull bit, running the bit at an unsuitable speed, or removing too much material in one pass. Check the bit condition, speed, depth, and feed rate.
Can you use a router table for small pieces of wood?
Yes, but small pieces require extra care because your hands may be closer to the cutting area. Use appropriate push blocks, featherboards, or other work-holding methods designed for the operation.
Conclusion
Learning how to use a router table is mainly about mastering a few fundamentals: choosing the right bit, setting the correct depth, securing the fence, understanding feed direction, and controlling the workpiece throughout the cut.
Start with simple edge profiles and scrap wood before moving to more demanding projects. Make shallow passes, use sharp router bits, support long boards, and follow the safety instructions for your specific router and accessories.
With practice, a router table can become one of the most useful tools in your woodworking shop. Once you develop safe and consistent techniques, you’ll be able to create cleaner edges, accurate grooves, attractive profiles, and professional-looking woodworking projects with much greater confidence.